It's a Coline hat from Lucy at {a-black-pepper}. I used Berroco Ultra Alpaca in color 6257 and size 8 needles. In the pattern, Lucy has links to a few versions of a tubular cast-on, and I used Ysolda's from that list. Had I the right (smaller) needles with me on our get away, I think the cast-on edge would not roll at all, but I only had the 8's. So there's a tiny roll and it has grown on me, and I kind of like it now. The pattern is perfect and clear. I had not worked cables in a long time and was a bit tentative, but I really wanted this hat. Can you see that some of the areas within the cables are in stockinette stitch and some are in reverse stockinette stitch? I didn't notice that until I sat with the pattern, but it really makes the pattern special and is probably what subconsciously attracted me to this cable hat over others I have seen. I love the effect! I made the medium size hat, and it fits very well. I love it with my new red down coat! (hey, there's another buffer!) {eta: the designer's name is Lucy, for some reason thru a message on Ravelry, I got the idea her name was Kim... even though I was pretty sure it was Lucy. Strangeness. Anyway, Lucy is the creative brilliance at {a-black-pepper}, you should check her out!}
 Also, I have a new top to protect me from our drafty windows! It's very comfortable and colorful. It is a Grown-up Girl Neighborly from Larissa of Stitches in Play. She modified Jennifer's (JCasa*Handmade) original Neighborly (for little girls) which I love too. Hana will get one someday. Jennifer's concept for Neighborly includes knitting an additional top for someone else, a "neighbor" so to speak. So, to honor her intention, there'll be probably at least two more coming off my needles! It was a pleasure to knit in an adult size, so I can only imagine that it will be quick and fun in wee sizes. My top turned out to be a stash-buster as I've had the two skeins of navy Lamb's Pride in the Stash for about ten years! The two skeins of Noro Kureyon are newer, but still had been in the Stash for a good while. Very satisfying to be chipping away at the Stash! Even Hana's color choices are skeins from the Stash. (there are more details & modification notes on my Ravelry page)
 So that is how I've been holding winter's cold at bay. Simple, humble knitting. To cheer my soul and warm my bones. Thank goodness for the tools at hand and for having the able hands to apply to comfort. click. click. click...
How have you been comforting yourself through these days?
Ps - Thank you for the pep-talk in the comments on my last post. It has truly put a bounce in my snowboots! :)


 The pattern is excellent and it was very fun to knit this crustacean. I didn't even mind all those legs! I think the top shell is my favorite part with its curved rim above the mouth (formed with shortrows) and the bobbles that make him lumpy. Although, the pincher claws are pretty awesome too. I'm so glad I had someone to make this for! He's going to have a good life.

 You will need some wool felt and embroidery floss in any colors that please you or your Valentine(s), scissors, a hand-sewing needle, and a heart-shaped pattern.
 The pattern I use is 2" wide and just shy of 2" tall. I cut it in the good ol' fold-a-piece-of-paper-in-half-and-cut-half-a-heart-shape way. Once I came up with a heart that was just right, I transferred it onto a piece of cardstock (aka magazine subsciption insert), cut it out, and use it repeatedly.
 Using a ball-point pen, trace around the pattern onto the felt twice. Cut out the two felt hearts.
 Now you can stitch a design on one of the felt hearts, or both if your heart desires. ;) I've done monograms in back-stitch or split-stitch, French-knot sprinkles, sashiko type stitches, chain-stitch flowers.... It is really up to you!
 Here's how I make a French knot. Send the threaded needle through the felt where you want a little 3-D dot. Lay the needle flat against the felt and wrap the floss around the needle. In this case, I went around three times, but two or four could also work.
 Then carefully point the needle back into the felt very close to where the needle came out in the first place. Tug the floss to snug the wraps around the needle close to the felt. Draw your thread through, keeping an eye on the wraps, maybe use your thumbnail to keep them from going astray. Ta-da!!! A sweet little French knot! Sprinkle them around as you like.
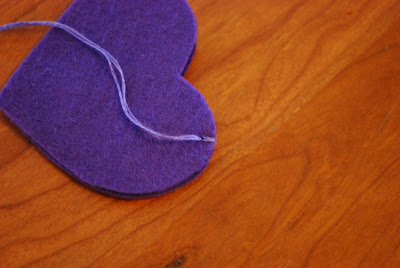
 So send the needle backwards under the floss of the first stitch.
 Then come to the front and stitch from front to back.
 Before you pull the stitch snug, send the needle through the loop the forms. Pull until the loop lays down over the gap between the front and back. Continue in this manner around the heart until you get to the top of the other "hump".
 At this point, blanket-stitch only the edge of the front piece.
 When you get to the other "hump", send the needle under the very first stich to create the horizontal "laying down" part of the stitch. Now continue with the blanket-stitching on the back piece.
 When you come to the other "hump" again, send the needle under the last stitch that joined the front and back.
 To secure the end, send the needle under that same stitch once more, but before pulling it snug, put the needle through the loop twice, then tug slowly. A knot will form; again, you may need to guide the knot with your fingernail to keep it from travelling up your thread away from the stitch. Now, slide the needle through a nearby edge of the felt, keeping the needle within the thickness of the felt (not sandwiched between the two pieces), poke the needle out again, and snip the floss close to the felt. This will bury the floss within the felt.

 So, about the felt hearts... I found this